Advanced Behringer WING Tutorial: Snippets in a Live Show Setup
Mastering Behringer Wing Snippets and Snapshots: Efficient Live Sound Management for Church Services
When managing live sound for a church service, especially one that includes a full band and multiple vocalists, efficiency and consistency are essential. Leveraging the Behringer Wing digital console’s powerful scene management tools — specifically Shows, Snapshots, and Snippets — can streamline your workflow, minimize errors, and create a more polished worship experience.
In this tutorial, we’ll be taking an in-depth look at how to use Snippets inside a Show alongside Snapshots. While we assume you’re already familiar with the basic difference between a Show, a Snapshot, and a Snippet (watch our linked video if you’re not), this guide will expand upon how Snippets can tailor and automate micro-edits within your live setup — like vocal effects or label color coding — without disrupting your full show mix.
Understanding the Workflow: Show > Snapshot > Snippet
Before diving into practical application, let’s summarize the hierarchy:
- Show: A full project that might include an entire service, rehearsal, or event schedule. It’s your central layout.
- Snapshot: A saved state of your mix that captures multiple parameters (fader levels, mutes, routing, etc.). Typically used for individual songs or set segments.
- Snippet: A lightweight “preset” that only changes specific, user-defined parameters. Ideal for quick vocal changes, effect toggles, or small tweaks that don’t require a full snapshot reload.
Practical Example: Automating Vocal Lead Settings in a Worship Service
Let’s now walk through how to use Snippets with Snapshots during a church service using the Behringer Wing.
Scenario:
You have a Sunday service with four worship songs, and each song has a different vocal leader. You’ve pre-mixed each song with a Snapshot to handle fader positions, mutes, and routing. However, you want to:
- Visually identify each song’s vocal leader on the channel strip using red color coding.
- Automatically assign the vocal leader to the delay bus (for vocal effects) in that snapshot.
Rather than manually adjusting channel colors or delay assignments for each song, you can automate this with Snippets.
Step-by-Step Guide:
Step 1: Create Your Base Show with Snapshots
- On the Behringer Wing, open a new or existing Show.
- Create Snapshots for each song you’ll be performing. For example:
- Snapshot 1: “Song 1”
- Snapshot 2: “Song 2”
- Snapshot 3: “Song 3”
- Snapshot 4: “Song 4”
- Pre-mix each Snapshot with your band during rehearsal: set fader levels, EQs, mutes, etc.
This ensures every song loads with the correct foundational mix.
Step 2: Create Snippets for Vocal Lead Settings
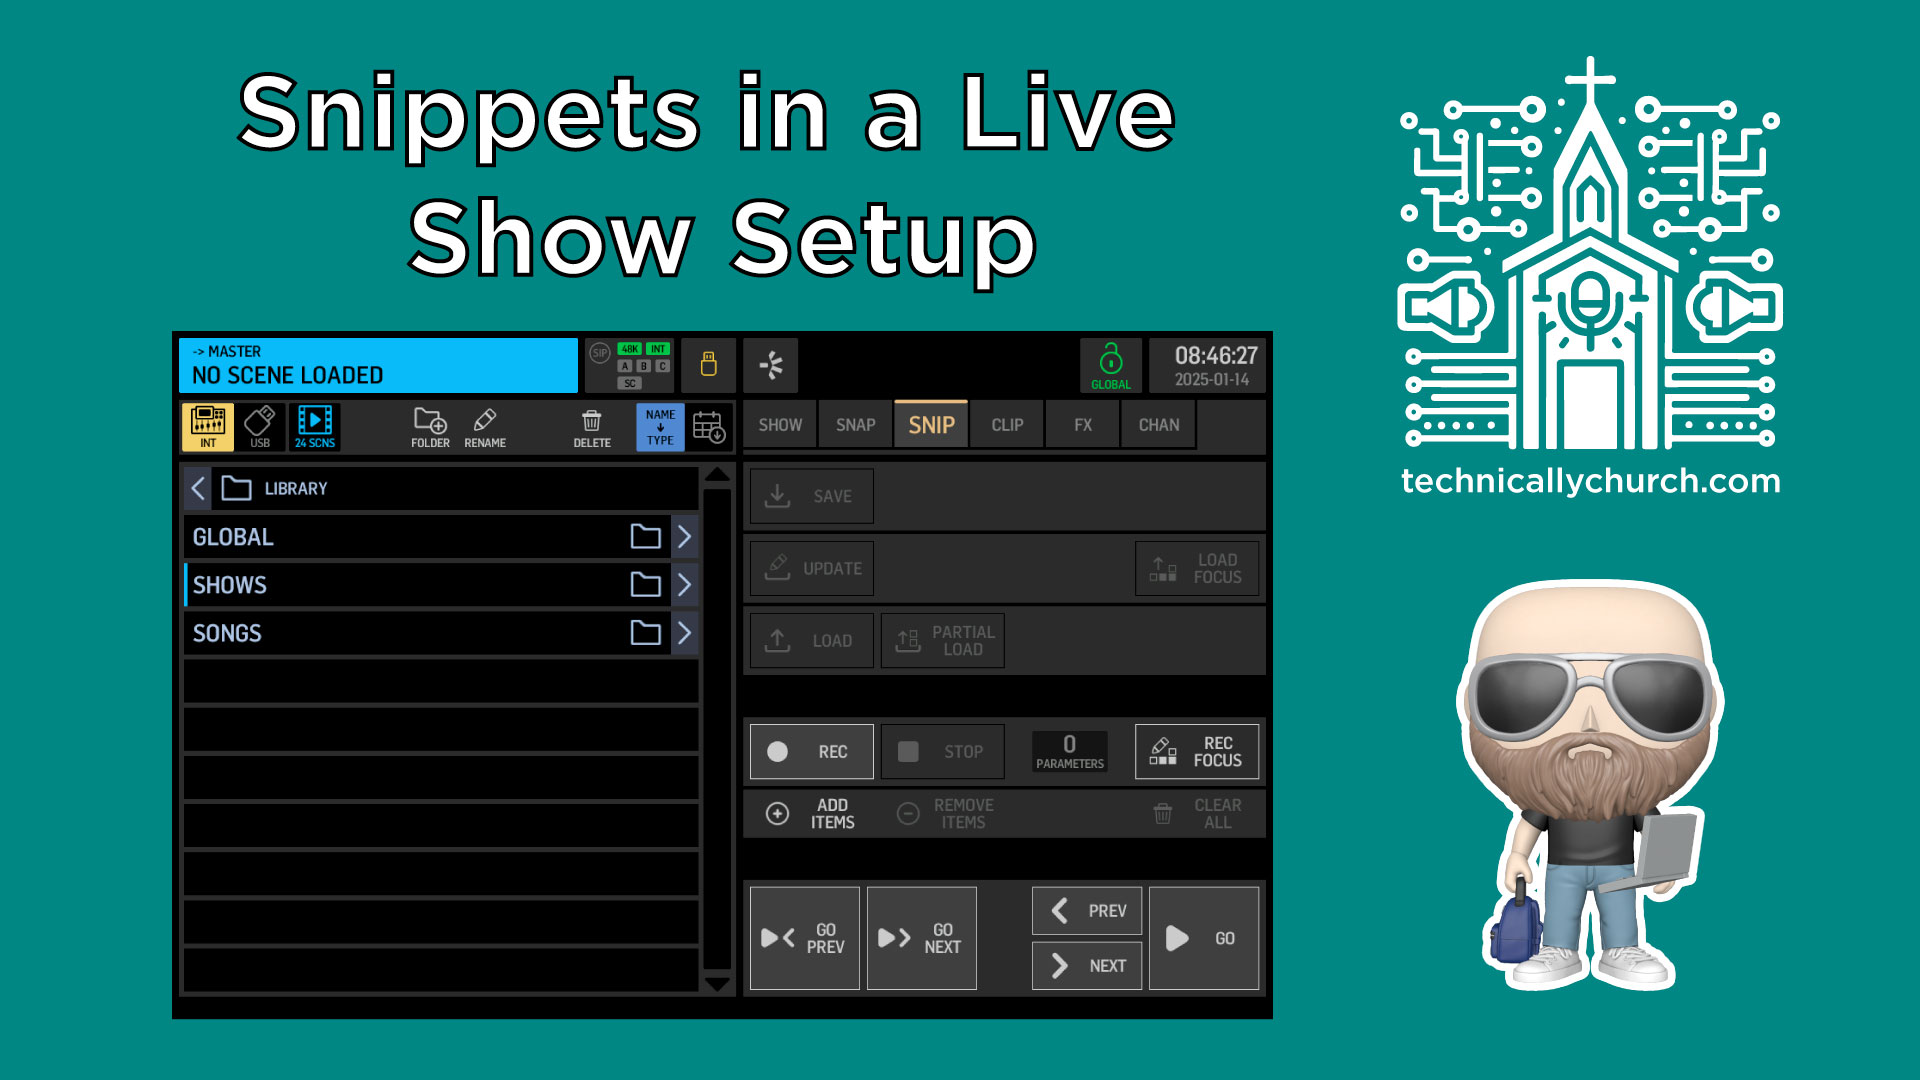
- Switch to the internal storage and navigate to:
- Menu > Library > Global > Vocal Leads
- Set up a Snippet for each possible vocal leader (in this case, six vocalists total):
- Snippet 1: Vocal 1 Lead
- Snippet 2: Vocal 2 Lead
- …and so on
- Inside each Snippet, define only these two parameters:
- Channel Strip Color (set to Red for the lead)
- Routing to the Delay Bus (apply delay FX to just this vocal)
💡 Tip: Keep Snippet changes minimal. Only adjust what’s necessary (in this case: channel color and delay routing). This is the strength of Snippets — they don’t touch unrelated parameters like fader levels or routing of other channels.
Step 3: Assign Snippets to Corresponding Snapshots
For every song that has a designated vocal lead:
- Select the song’s Snapshot in the Show.
- Click “Add Snippet” or navigate to:
- Menu > Show Control or Scene Management
- Find and click the appropriate Vocal Lead Snippet.
- For instance, if “Song 1” is led by Vocalist 1, select Vocal 1 Lead
- Click “Add,” and the Snippet will appear under the selected Snapshot (e.g., Song 1).
- To reorder (if needed), drag the Snippet directly above or below the Snapshot for clarity.
- Click the “Link” button on each Snapshot to attach its corresponding Snippet so they will be triggered together.
Repeat this process for all four songs (or however many you have in your set).
Step 4: Trigger Snapshots During Your Service
Once set:
Firing Snapshot 1 (Song 1) will:
- Recall your premixed song settings.
- Trigger Snippet: vocal channel becomes red and delay FX are applied.
Firing Snapshot 2 (Song 2) will:
- Load new song settings.
- Trigger the snippet for Vocalist 4 (if they’re the lead), updating only the parameters you defined in the snippet.
This seamless integration improves real-time mixing and avoids the need for manual adjustments while under pressure.
Why This Matters in a Church Environment
When you’re dealing with multiple services, team rotations, and dynamic events like live worship, automation becomes a lifesaver. Using Snippets in this way:
- Reduces manual error.
- Improves consistency service to service.
- Makes it easier to train volunteers with simplified workflows.
- Allows visual cues (red labeling) to make identifying lead vocalists fast and intuitive.
- Gives the flexibility to modify just a small part of the mix without affecting your overall sound.
Pro audio tools like the Behringer Wing are built to handle complex routing and mixing, but they shine when used smartly — and Snippets are one of the best ways to start automating nuance in your church audio workflow.

