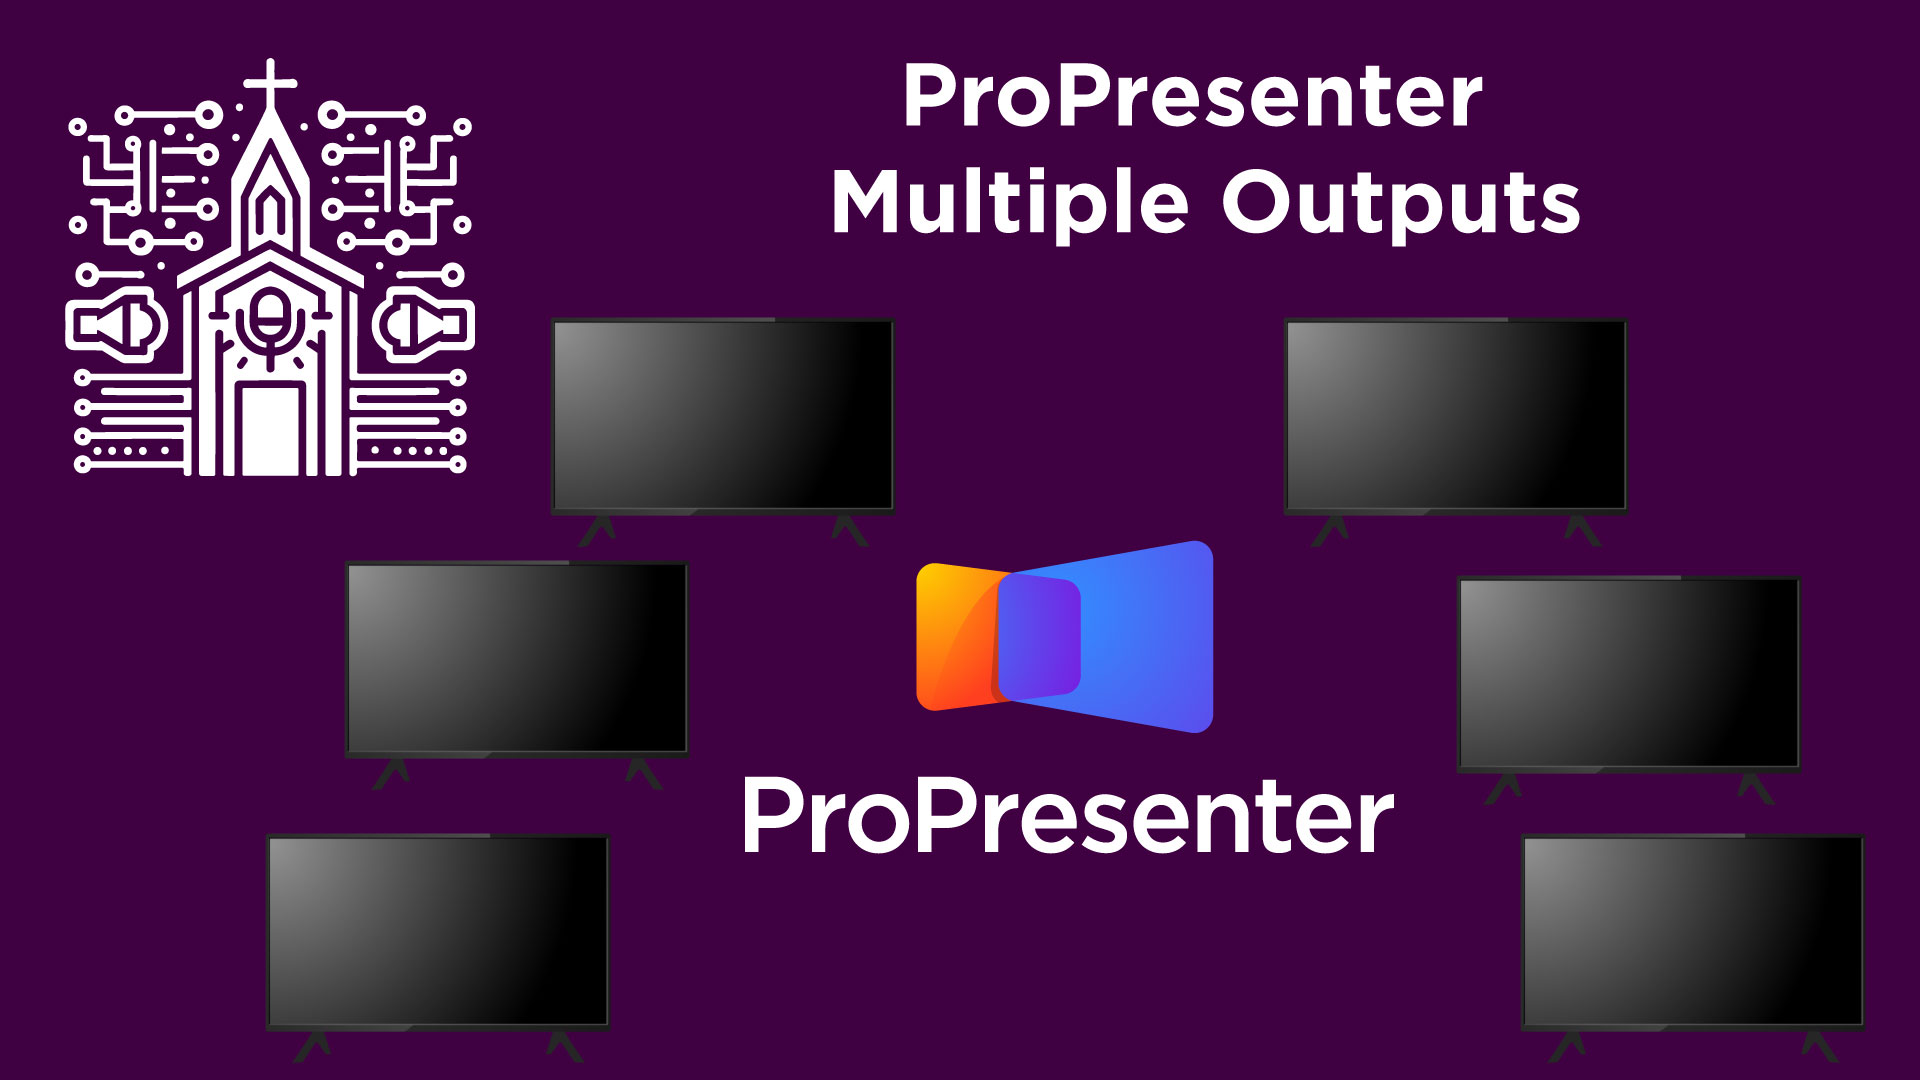
Equipment to Expand Your Mac’s Outputs for ProPresenter: What’s Needed
In today’s article, we’re going to explore a comprehensive setup for using multiple video outputs with a Mac Mini, particularly for running ProPresenter effectively in a production environment. This guide is tailored for those who need to expand their display capabilities beyond the standard outputs provided by Apple devices, such as for church services, conferences, or any event that requires multiple displays for different purposes like live video feeds, lower thirds, full screen videos, and stage monitors for musicians.
Equipment Needed: (Amazon affiliate links)
- Apple Mac Mini:
- The latest Mac Mini models, such as the M2, come with an HDMI port and USB-C ports that can support an additional display output via an adapter.
- USB-C to HDMI Adapter:
- To utilize the second display output on the Mac Mini, a reliable USB-C to HDMI adapter is needed. Apple brand adapters are recommended. This is only needed if you need a total of 6 outputs with this setup.
- Blackmagic Design DeckLink Duo Card:
- This PCI card offers four SDI outputs and is crucial for setups requiring more than the two native outputs.
- Sonnet Echo Express SE I PCI Enclosure:
- Since the Mac Mini lacks a PCI slot, a USB-C enclosure for PCI cards is required to use the DeckLink Duo card with the Mac.
- SDI to HDMI Converters:
- Needed if you need to convert your SDI signals to HDMI, for example if connecting to a TV.
Step-by-Step Setup Guide:
Setting Up the Mac Mini:
- Connect the HDMI Output:
- Use the HDMI port on the Mac Mini to connect to the primary monitor or local display for operating ProPresenter.
- Use USB-C for the Second Display:
- Connect the USB-C to HDMI adapter to the Mac Mini and link it to an additional display like a projector or a secondary monitor.
Expanding Outputs with the DeckLink Duo Card:
- Prepare the PCI Enclosure:
- Install the Blackmagic Design DeckLink Duo card into the PCI enclosure. Ensure it’s securely mounted and ready for use.
- Connect the Enclosure to the Mac Mini:
- Using the USB-C cable provided with the enclosure, connect the enclosure to the Mac Mini. This connection will provide four additional SDI outputs or inputs.
- Assign Outputs to Devices:
- Connect SDI cables from the DeckLink card to your video switcher, projector, and any additional monitors. Configure each output in the Blackmagic software to match the intended display device, such as lower thirds, full-screen video, or stage displays for musicians.
Software Configuration:
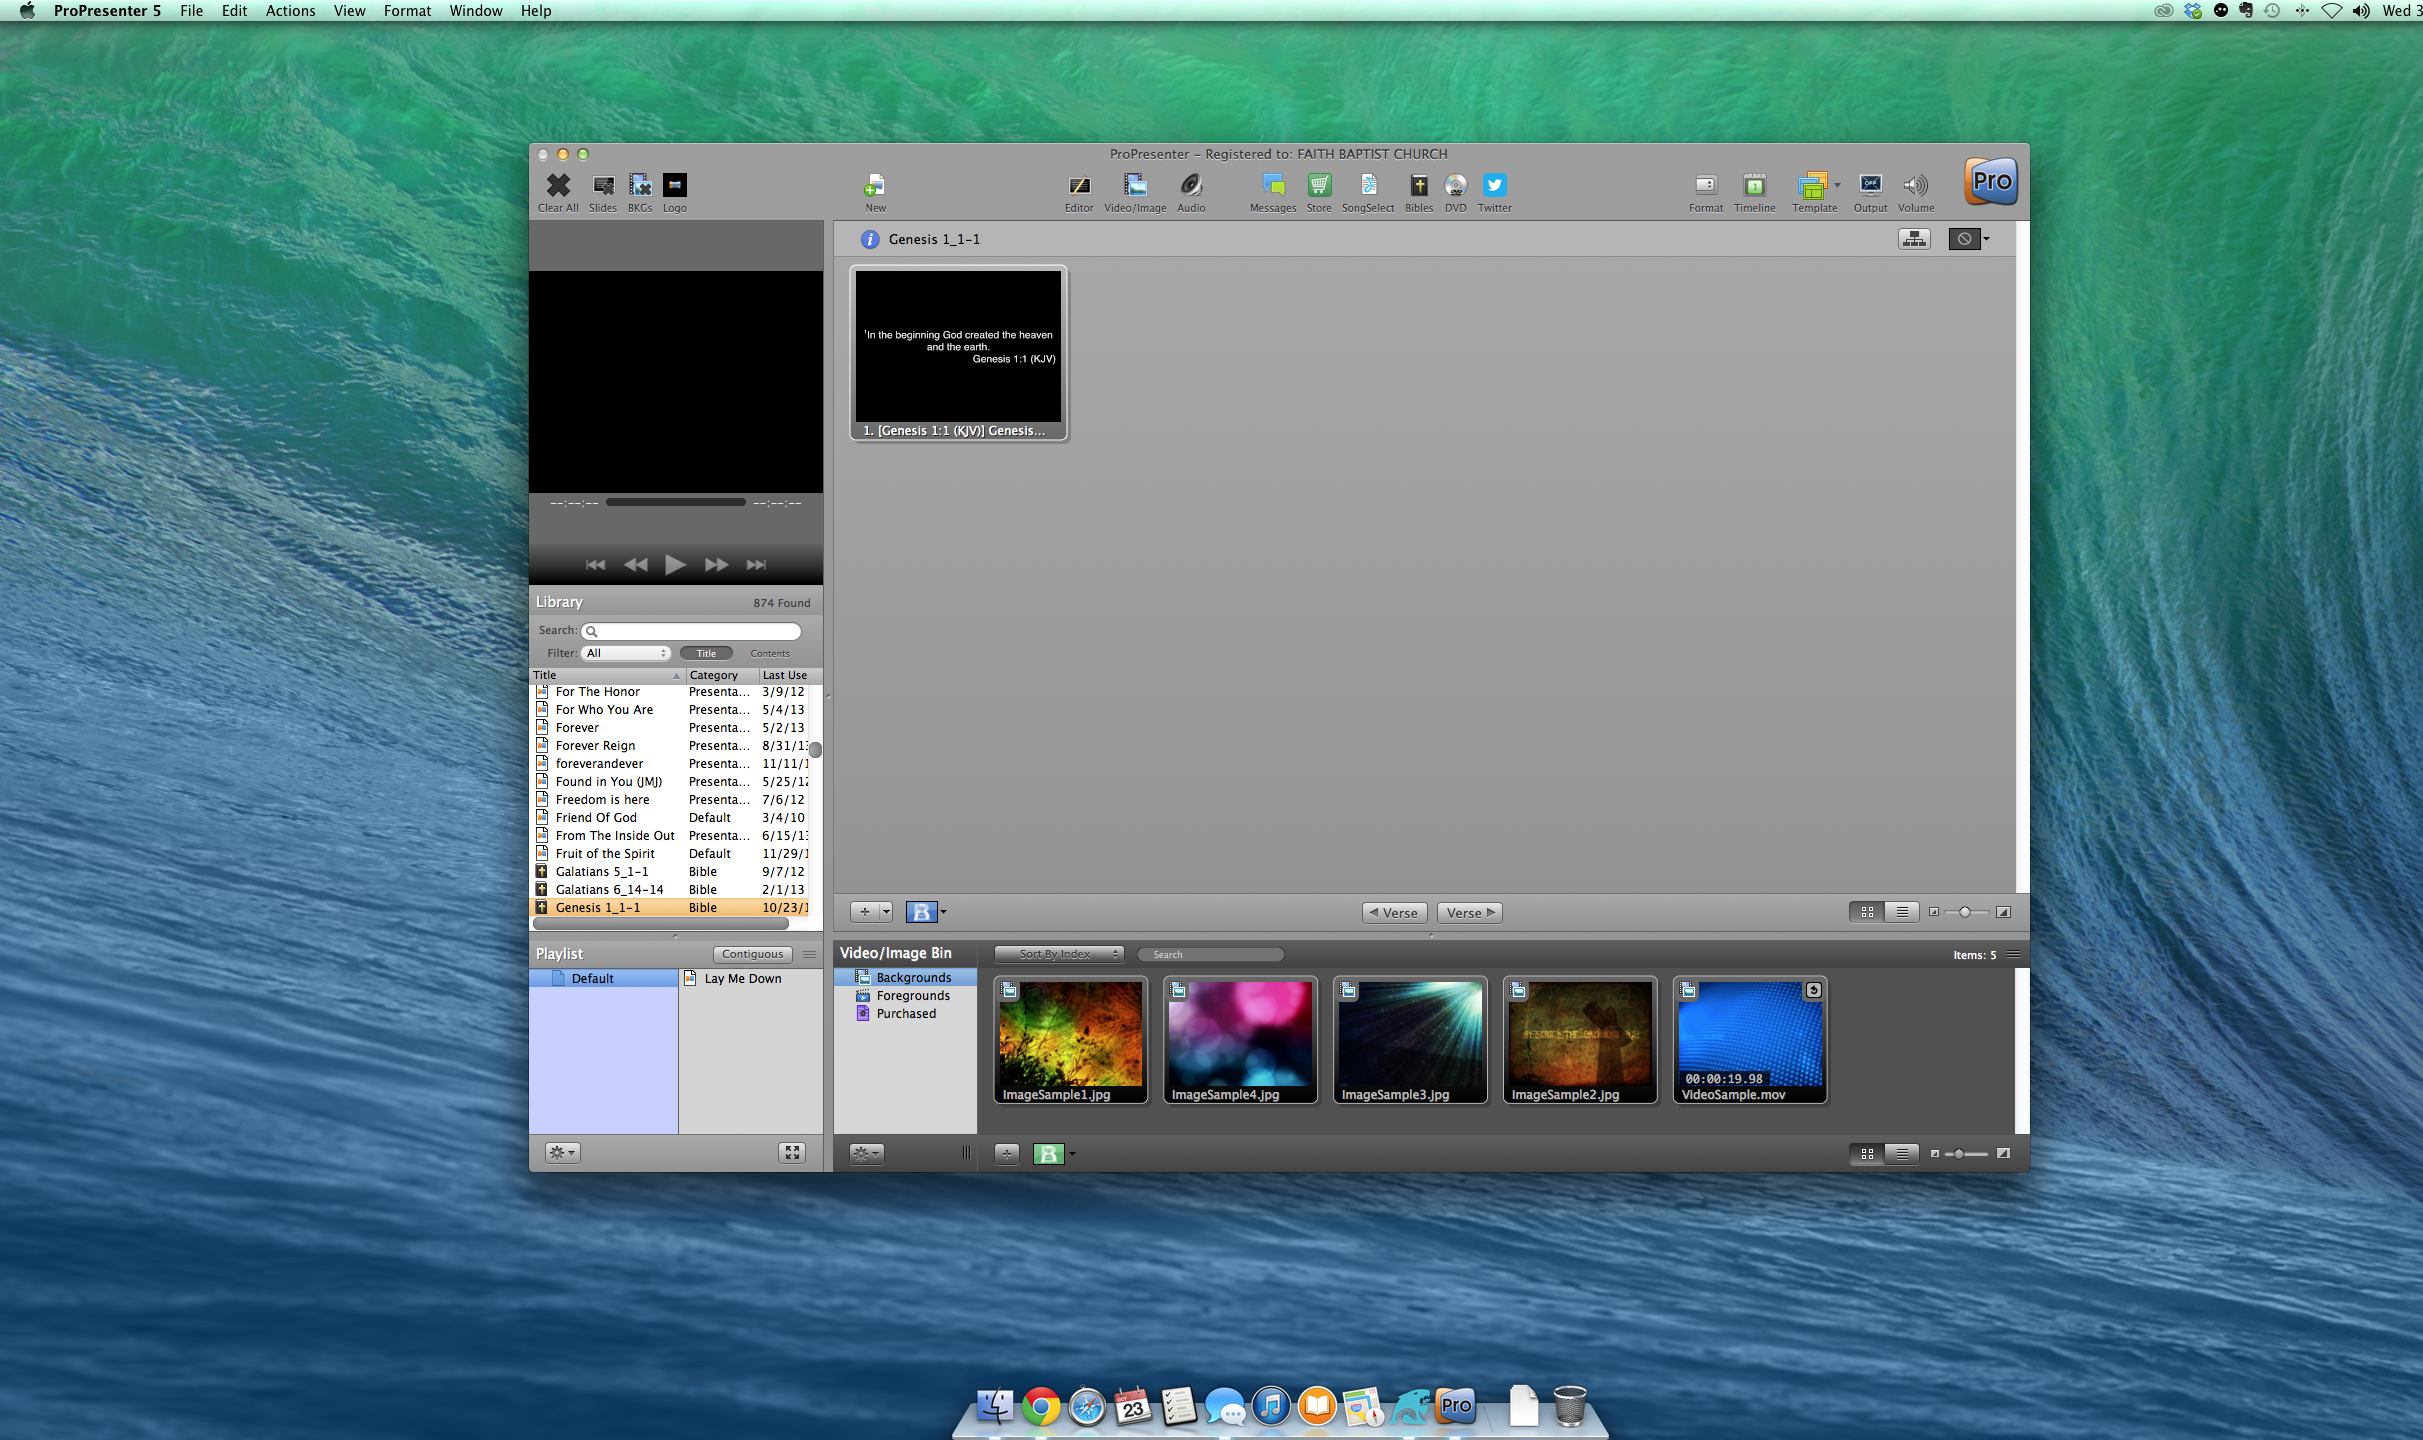
- Set Up ProPresenter:
- In ProPresenter, configure each display output under the preferences menu. Assign each output to the correct task (e.g., main output, stage display).
- Test the Setup:
- Run a test to ensure that all connected displays are receiving the correct feed from ProPresenter and that transitions and cues are functioning smoothly through the stream deck.
This guide is just the beginning, for a comprehensive installation and configuration tutorial on the software, I have an additional video for that here.
Conclusion:
This setup allows for high flexibility and reliability in environments where multiple video outputs are crucial. The combination of Mac Mini’s native capabilities with the expanded potential through the Blackmagic Design DeckLink Duo card ensures that you can manage complex visual presentations smoothly.
By following this guide, you can achieve a professional-grade video production setup capable of handling various outputs effectively, ensuring your presentations or services run without a hitch.