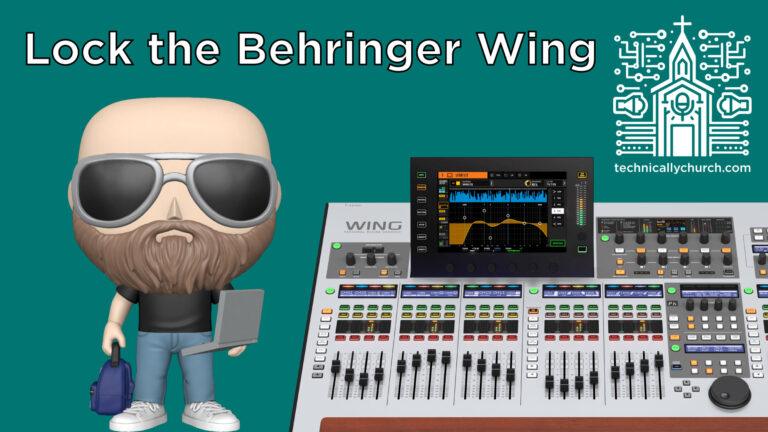
Master Your Monitor Mixes: A Step-by-Step Guide to Connecting the Behringer Wing with the Wing Q iPad App
Thanks for joining me today. As an audio engineer working in a live church environment, one of the biggest challenges is juggling the Front of House (FOH) mix while simultaneously managing multiple, distinct monitor mixes for the musicians on stage. If you don’t have the luxury of a dedicated monitor console and engineer—which most of us don’t—this can quickly become overwhelming.
Today, we’re going to solve that problem. This guide will walk you through connecting your Behringer Wing console to an iPad for remote monitor control, specifically using the Behringer Wing Q app. This simple setup empowers your musicians to control their own in-ear or wedge mixes, freeing you up to focus on making the main service sound incredible.
Choosing the Right Tool: Wing Q vs. Wing Copilot
Behringer offers two free apps for remotely controlling the Wing: Wing Copilot and Wing Q. It is crucial to understand the difference to ensure you give your team the right tool for the job.
- Wing Copilot: This is a comprehensive control app designed for the audio engineer. It gives you access to nearly every parameter on the console, from faders and EQs to routing and effects. While incredibly powerful for you as the FOH operator walking the room, giving this app to a musician is a recipe for disaster. It’s far too easy for them to accidentally navigate to the main mix and unknowingly alter the FOH sound.
- Wing Q: This app is purpose-built for personal monitor mixing. It restricts the user’s control to only the buses (your monitor sends). A musician using Wing Q can adjust the levels of channels in their assigned bus and nothing else. They cannot affect the FOH mix or any other musician’s mix, making it the perfect, safe tool to hand out on stage.
For our goal of creating personal monitor mixes, Wing Q is the clear and only choice.
Step 1: Getting Your Behringer Wing on the Network
Before your iPad can talk to the console, the Wing must be physically connected to your network and have a valid IP address.
Physical Connection:
- Locate the Ethernet Control Port on the back of your Behringer Wing.
- Plug one end of a standard Ethernet cable into this port.
- Plug the other end of the cable into your church’s network switch or router. This should be the same network that your Wi-Fi is on.
Network Configuration (on the Wing):
Now, we need to configure the network settings on the console itself.
- On the Wing’s main touchscreen, press the SETUP button.
- Navigate to the REMOTE tab on the left-hand menu.
- On the right side of this screen, you’ll see the “NETWORK” settings.
Here, you need to decide between two IP modes: DHCP or Static.
- DHCP (Dynamic Host Configuration Protocol): This is the easiest and most common setting. When set to DHCP, the Wing will automatically ask your network router for an IP address. For 99% of users, this is the recommended setting. It’s plug-and-play and requires no advanced networking knowledge.
- Static: This option is for more advanced network environments. It allows you to manually assign a permanent IP address to your Wing. You would only do this if you have a specific networking scheme and know which IP addresses are available to avoid conflicts.
How to Set the IP Mode:
- Tap the button next to “IP Mode.”
- Select DHCP from the options.
- The console will now communicate with your router and should receive an IP Address, Subnet Mask, and Gateway automatically. You will see these fields populate with numbers (e.g., IP Address: 192.168.1.164).
Once you see a valid IP address displayed, your Wing is officially on the network and ready to be discovered.
Step 2: Preparing Your iPad
Next, let’s get the iPad ready for connection.
- Connect to Wi-Fi: Ensure your iPad is connected to the same Wi-Fi network that your Behringer Wing is physically plugged into. This is a critical step; if they are on different networks, they will not be able to communicate.
- Download Wing Q:
- Open the App Store on your iPad.
- Search for “Behringer Wing.”
- You will see a few results, including Wing Copilot and Wing Q.
- Select Wing Q (the icon is typically blue with a “Q”) and download it.
Step 3: Connecting the Wing Q App to Your Console
With the app installed, it’s time to make the connection.
- Open the Wing Q app on your iPad.
- When you first launch the app, or if it isn’t connected, you may be taken directly to a connection screen. If not, tap the Wi-Fi symbol in the top-right corner.
- On the connection screen, the app will automatically scan your network for a Wing console.
- If Successful: Your Wing will appear in the list under “Discovered Devices.” Simply tap on it to connect. The Wi-Fi symbol in the corner will turn solid green, indicating a successful connection.
- If Your Wing Doesn’t Appear:
- First, tap the Rescan button to try again.
- If it still doesn’t show up, double-check that your iPad’s Wi-Fi and the Wing’s Ethernet are connected to the same network.
- As a last resort, you can connect manually. Go back to your Wing’s SETUP > REMOTE screen, note the IP Address, and type it into the “Manual IP” field in the Wing Q app, then tap Connect.
Step 4: Navigating and Using the Wing Q App
Once connected, using the app is incredibly intuitive.
- Select Your Bus: The first thing a musician needs to do is select the correct monitor mix to control. In the top-right corner of the app, tap the blue button that shows the current bus name (e.g., “IEM 5”). This will open a list of all available buses and matrixes on your console. The musician simply taps their assigned mix (e.g., Bus 1 for Vocal 1, Bus 2 for Keys, etc.).
- Adjust the Mix: The main screen displays faders for all the channels being sent to that bus. The musician can now:
- Move faders up or down to adjust the volume of each instrument or vocal in their mix.
- Tap the channel ON/OFF button to mute or unmute a specific channel (it will be grayed out when off).
- Navigate Layers: The app will mirror the channel layers you have on your console, allowing you to swipe or select different layers to access all your channels.
The Big “Gotcha”: Understanding Channel Layout
This is one of the most important things to understand about Wing Q. The Behringer Wing console allows for incredible customization of the physical fader banks; you can move channels anywhere you want. However, the Wing Q app does NOT follow your custom fader layout.
Instead, the app organizes channels strictly by their original Source Channel Number.
For example, if your lead vocal is on Source Channel 3, but you’ve moved it to physical fader 1 on your Wing’s main layer, it will still appear as channel #3 in the Wing Q app. This can be confusing for musicians if your sources aren’t organized logically.
Pro Tip: To make the Wing Q experience seamless for your team, organize your input sources logically from the start. A good practice is to group instruments together in the ROUTING > SOURCES page (e.g., Drums on 1-8, Bass on 9, Guitars on 10-11, Keys on 12-13, Vocals on 14-18, etc.). This way, the layout in the app will be predictable and easy to navigate.
Putting It All Together: A Practical Demonstration
Let’s confirm everything is working as intended. Your musician is on stage with the iPad, and you are at the console.
- FOH View: Make sure you are on your main layer, controlling the FOH mix. Have the musician adjust a fader on their iPad (let’s say the Music channel). You will see them make the change, but the corresponding physical fader on your console will not move. This is correct! They are only changing their monitor bus, not your house mix.
- Sends on Fader View: Now, on the Wing, enter “Sends on Fader” mode for the bus that musician is controlling. For example, if they are on Bus 1, select Bus 1 and engage Sends on Fader. Your faders now represent the mix for Bus 1.
- Confirm the Connection: Have the musician move the Music channel fader on their iPad again. This time, you will see the physical Music channel fader on the Wing move in sync with their adjustment on the iPad.
This confirms that the app is connected correctly and is remotely controlling the assigned monitor bus, completely independent of the main mix.
By following these steps, you can quickly and easily set up a powerful, personal monitoring system for your entire team. This not only improves their experience on stage but also reduces your stress load, allowing you to focus on what matters most: delivering a clean, powerful, and distraction-free audio experience for your congregation.