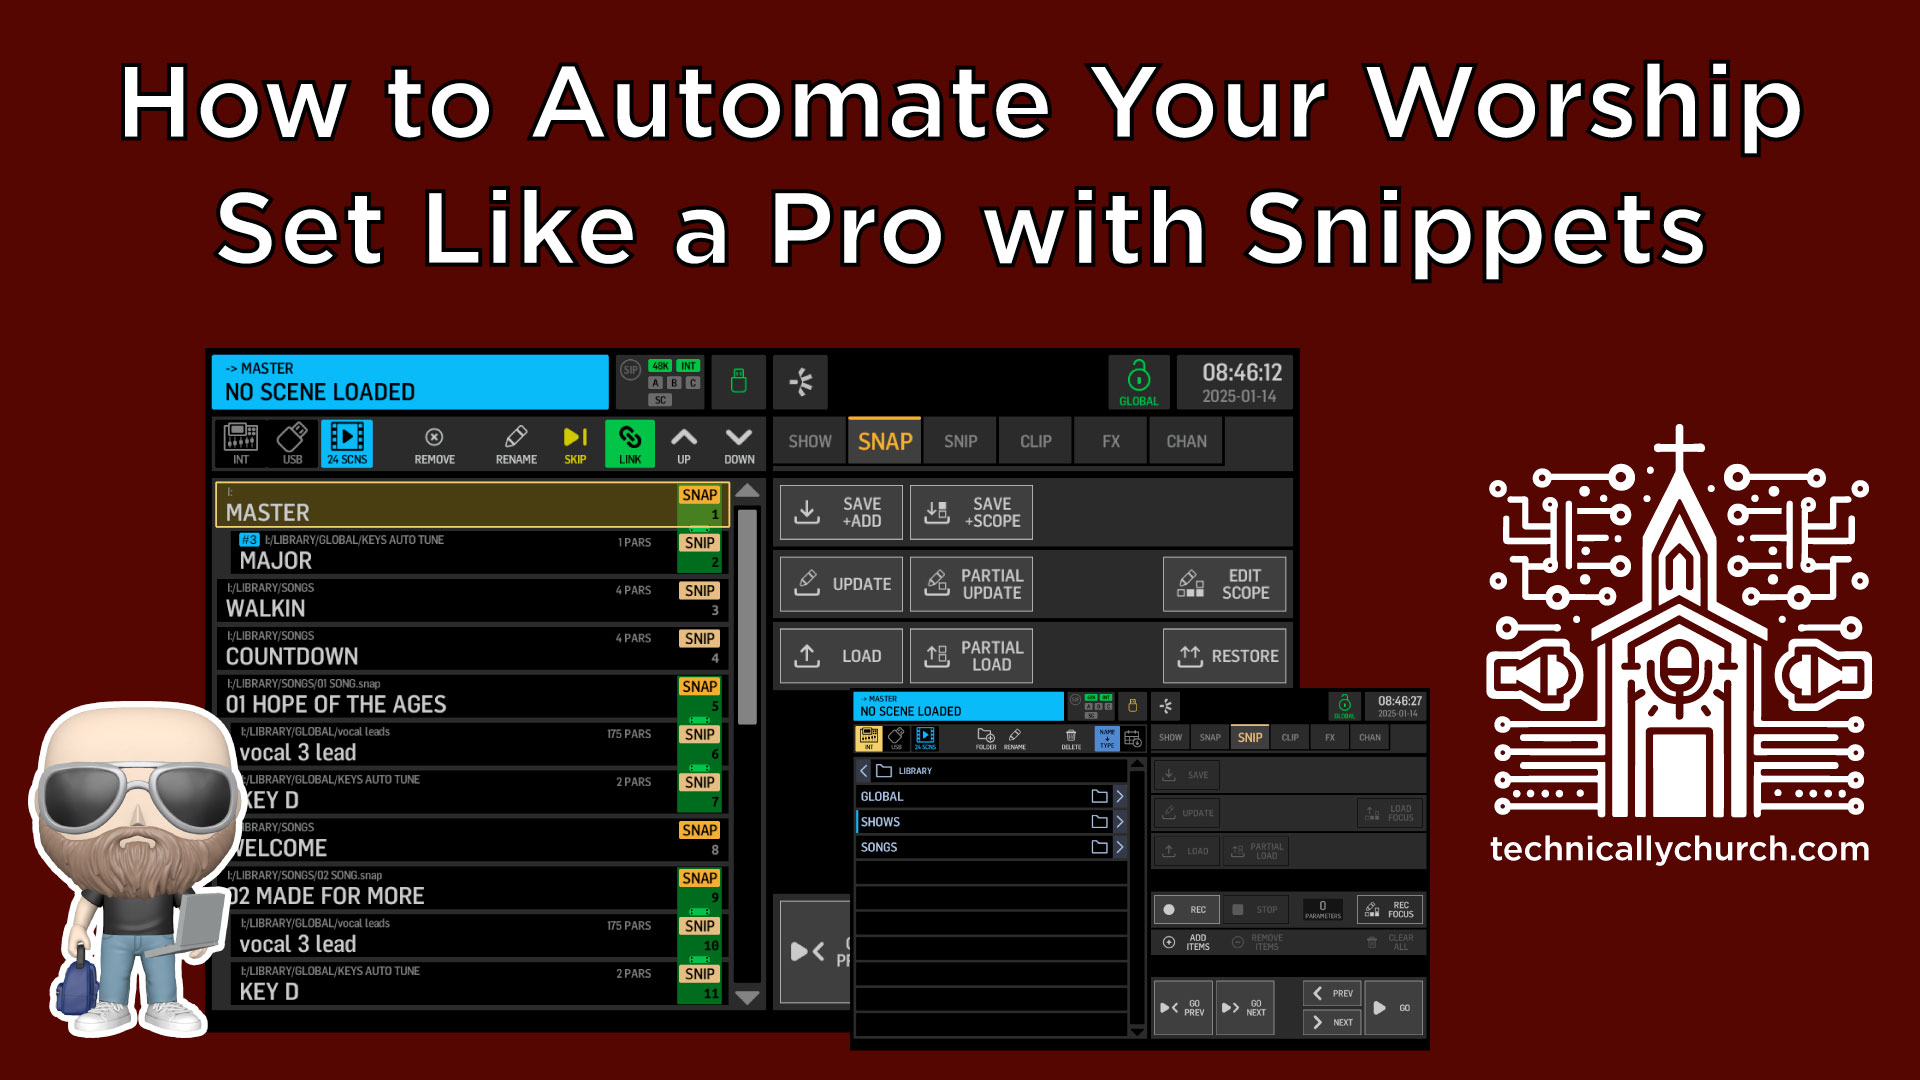
How to Automate Your Worship Set Like a Pro with Snippets
In a high-impact live production environment—especially in houses of worship—consistency, efficiency, and precision are crucial. Whether you’re an audio volunteer or a seasoned professional, the Behringer Wing digital mixer allows you to automate much of your workload, allowing you to focus on mixing dynamically and responsively during service. In this article, we’re going to dive deep into the power of automation on the Behringer Wing, specifically using Shows, Snapshots, and Snippets.
This isn’t just about convenience; it’s about building a workflow where your console does the backstage heavy lifting. From vocal leader designation to Auto-Tune key tracking and dynamic DCA grouping, let’s explore how thoughtful preplanning can let your mix evolve intelligently with your worship set.
Understanding the Core Concepts
Before diving into the automation workflow shared in the video, it’s important you understand the key components involved:
1. Shows
A “Show” is your main container—a master file that holds everything else: snapshots, routing, snippets, etc. Think of this as the project file for a specific service or event.
2. Snapshots
Each “Snapshot” captures the state of most console settings—think channel processing, routing, levels, muting—for a musical moment. These are best used when you want to recall full mix states for each song or transition.
Use Case: Create a separate snapshot for each song in a worship set.
3. Snippets
Unlike snapshots, snippets are laser-focused. They allow you to automate smaller sets of changes, like assigning a delay to a single vocal channel, updating DCA groups, or modifying labels and colors. This allows for a more nuanced and modular control structure.
Use Case: Dynamically assign lead vocals, change Auto-Tune settings, or reconfigure DCAs per song.
Workflow Walkthrough: Step-by-Step Automation Setup
Let’s walk through a real-world example, based on a 4-song worship set with dynamically changing lead vocalists and keys.
Step 1: Prepare a Show and Snapshots
- Open your Behringer Wing and navigate to the “Show” section.
- Create a new show. Let’s call it “Sunday AM Service.”
- Create a snapshot for each song (e.g., “Song 1”, “Song 2”, etc.).
- Within each snapshot, mix the song as you would live—EQs, dynamics, routing, and levels.
- Save each snapshot.
Step 2: Set Up Vocal Lead Snippets
Each song has a different lead vocalist. You want to:
- Color code the lead vocal channel (e.g., red).
- Route only that vocal channel to a delay bus.
- Exclude the lead vocal from the backing vocals DCA and add the other five.
To Set This Up:
Create a new snippet:
- Go to
Library > Global > Snippets. - Isolate settings:
- Apply only Label/Color to the lead vocal channel.
- Enable routing for the delay bus on selected channel.
- Adjust DCA assignments as needed.
- Save the snippet with a descriptive name (e.g., “Vocal 1 Lead”).
- Go to
Repeat for each potential lead vocalist (Vocal 2 Lead, Vocal 3 Lead, etc.).
Step 3: Automate External Auto-Tune with MIDI Snippets
If you’re using Auto-Tune controlled via an external computer and middleware like Ableton Live, you can use Wing’s MIDI capabilities to dynamically change the key of Auto-Tune.
Requirements:
- A MIDI connection from Behringer Wing to the computer.
- Configuration in Ableton Live to receive Program Change or Control Change messages.
Steps:
Create a snippet for each musical key your songs are in.
Within each snippet:
- Send a specific MIDI note or CC that corresponds with the key of the song.
- Save it as “Key of C,” “Key of E,” etc.
Test by firing each snippet and checking Auto-Tune adjustment.
Step 4: Build the Automation Hierarchy
Behringer Wing’s automation lets you “link” snapshots and snippets, so firing one command triggers a cascade of structured events.
To Link Snippets:
- Navigate to your SNAPSHOTS section.
- Select “Song 1” Snapshot.
- Click on your “Vocal 1 Lead” snippet > click Link.
- Click on “Key of C” snippet > click Link again.
Now, your hierarchy looks like:
- Song 1
- Vocal 1 Lead
- Key of C
- Vocal 1 Lead
Repeat for each song/snapshot in your set.
Step 5: Live Execution
Once everything is programmed, the live show becomes simple:
- Before the song begins, press “Go” on Song 1.
- All snippets below (Vocal Lead & Key) trigger instantly.
- Mix the song dynamically with all key elements already configured.
- Navigate to the next song and hit “Go” again.
Rinse and repeat.
BONUS: Reconfigure Mixing Surface Per Song
One of the Behringer Wing’s hidden powers lies in moving channels on your surface itself.
For example:
- Song 2 has a banjo player; Song 3 does not.
- Record a snippet with the banjo brought into the main mix layer.
- Create another snippet for Song 3 that removes it.
With your snippets, you can reconfigure your physical surface dynamically—ensuring high-priority instruments are always at your fingertips.
Final Thoughts: The Power of Preplanning
With just a bit of upfront planning, snippets and snapshots can take your mix from reactive to proactive. You’ll not only increase your sound consistency across songs but also reduce mental load during high-pressure live events. The Behringer Wing, through meticulous automation, transforms into an adaptive live production platform.
Whether you’re dealing with complex vocal arrangements, varied instrumentation, or dynamic key changes tied to your Auto-Tune software, this level of smart automation will elevate your production game to professional standards.