Unlocking the Power of User Patching on the Behringer Wing
The Behringer Wing has become a staple in many live sound and church audio environments, thanks to its highly flexible routing options, including its ability to utilize user patching. If you’re new to user patching or not entirely sure how it can serve your setup, this guide will walk you through it step by step. I’ll not only expand on what was covered in the video but give you practical applications you can implement today.
*Affiliate Links (Help support my channel just by clicking and buying anything you need!)
Behringer Wing
Behringer DL32 Stage Snake
Wing Dante Card
USB Drives that work with the Wing – Option 1 | Option 2
What is User Patching?
At its most basic, user patching lets you manipulate the signals on the Behringer Wing by controlling how and where they are routed. You can patch a signal in its raw state (before any processing like EQ, compression, gates, etc.) or after processing (post-EQ, compression, inserts, and more).
This flexibility is essential because it allows you to build a workflow tailored to your specific needs, whether that’s mixing in-ear monitors, configuring personal monitor systems like the Behringer P16, or setting up advanced configurations for multitrack recording on platforms like Adobe Audition.
Why Use User Patching?
Here are the primary use cases of user patching:
- Processed Audio for Monitor Systems
Deliver a mix with full EQ and compression to the artist’s monitor without affecting other outputs. - Multitrack Recording with Processing
Send audio through Dante (or other digital formats) for multitrack recording, capturing signals either raw or fully processed, depending on your needs.
By leveraging these use cases, user patching greatly enhances the flexibility and efficiency of your sound setup.
A Step-by-Step Guide to Setting Up User Patching
Prerequisites:
- Behringer Wing Console, running at least firmware version 3.05.
- An understanding of your routing setup (e.g., stage boxes, P16s, Dante, etc.).
- Basic familiarity with the console’s signal flow.
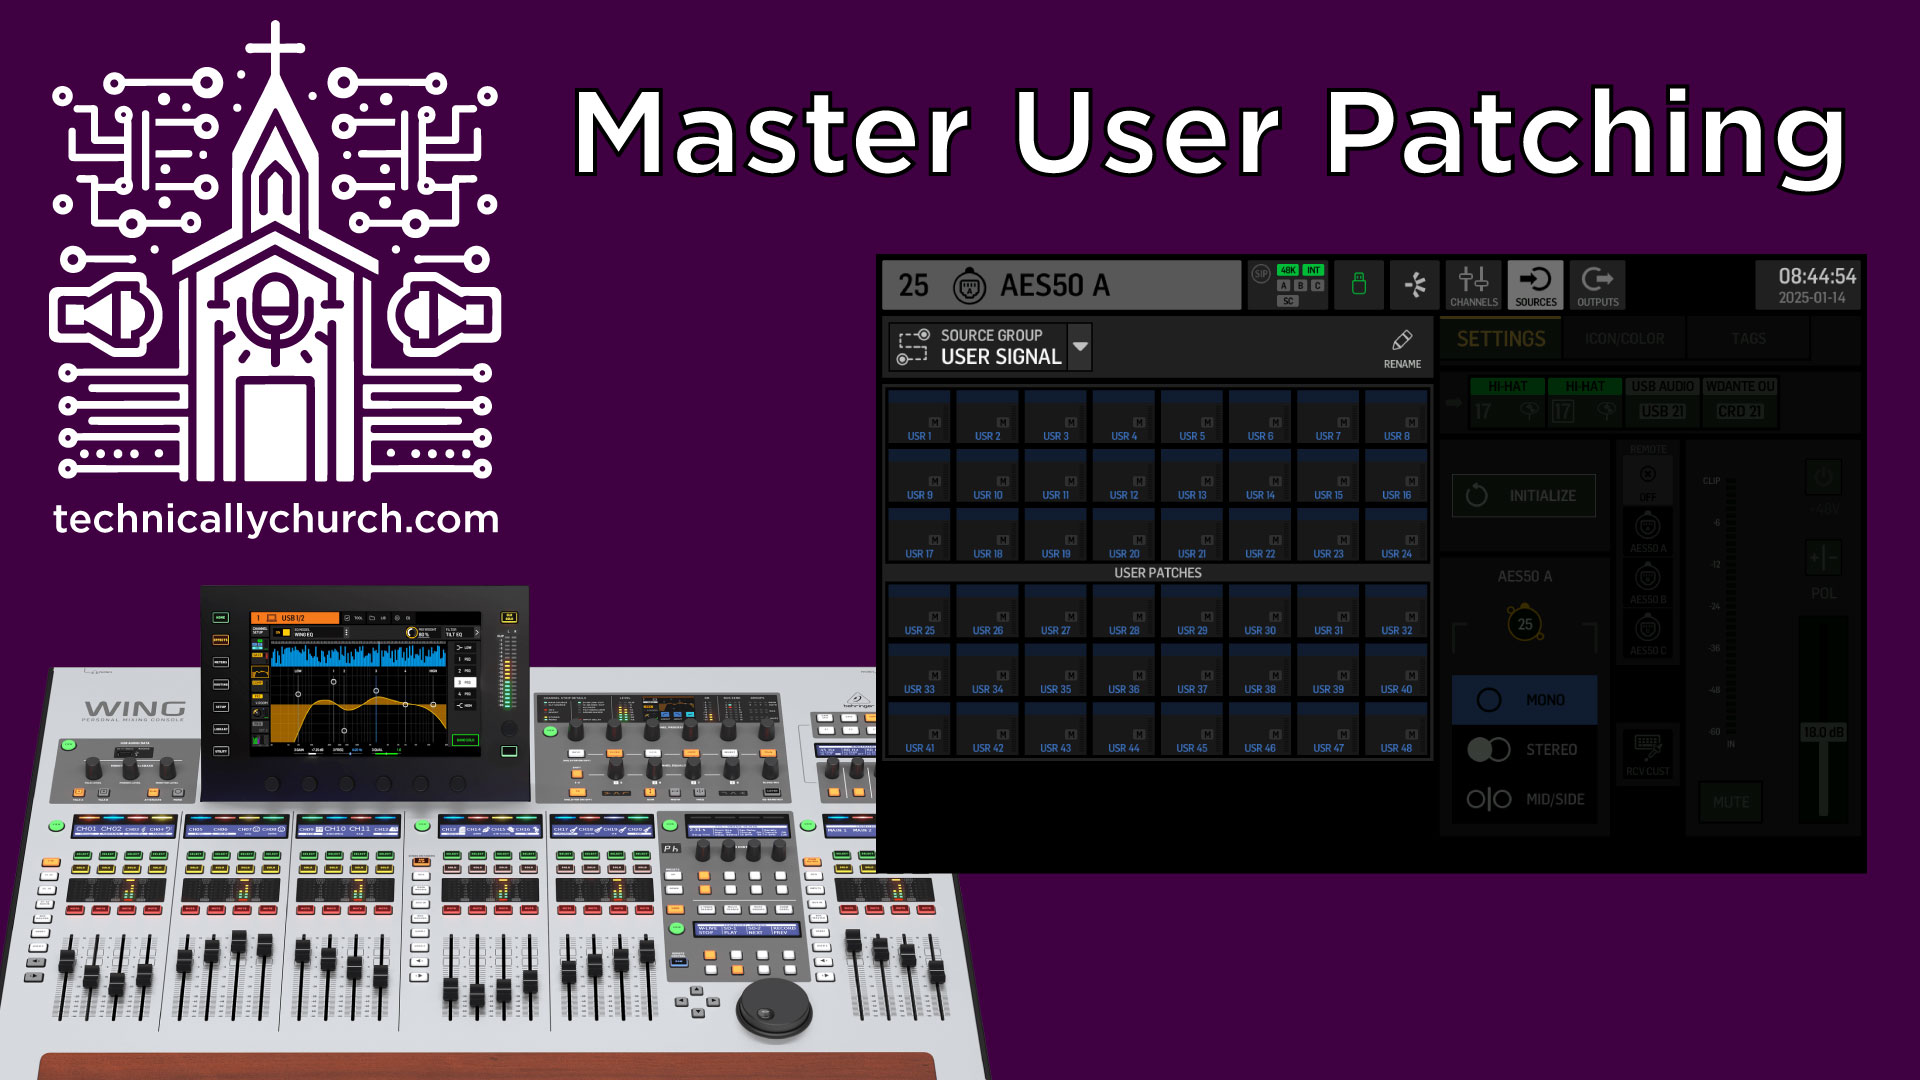
Step 1: Access the Routing Menu
- On the Behringer Wing console, press the Routing button.
- Navigate to the Sources tab, where your input sources are configured.
- From the Source Group dropdown menu, select User Signals.
Here, you’ll see a grid of 48 user patch slots, which may currently be unused.
This is where you’ll create custom signal paths for various use cases.
Step 2: Use Case 1 – Processed Audio for Monitor Systems
If you’re running both wireless in-ear monitors and Behringer P16 personal monitoring systems for your musicians, you’ve likely encountered the challenge of sending different versions of a signal to each system. Here’s how you can use user patching to manage this.
Situation:
- Wireless in-ear monitors need processed audio (EQ, compression, etc.).
- P16 monitors need processed audio (not raw signal) but aren’t equipped to apply their own advanced processing.
Instructions:
Define the User Signal
- Go to Routing > Sources > User Signals.
- Select a user slot (e.g., User Signal 1).
- Assign a Channel from your input (e.g., Vocal Mic 1).
- Choose appropriate settings:
- Select Tap Point (e.g., post-EQ or after compressor).
- Choose L+R, L, or R as the output signal mode.
- Click Close to finalize the patch.
Example: User Signal 1 now contains Vocal Mic 1 with post-EQ settings.
Assign to P16
- Go to Routing > Outputs > AES50 A (or B, depending on your setup).
- Locate the output channel reserved for the P16 (e.g., Output 34 for P16 Channel 2).
- Replace the raw input signal with the new User Signal 1.
Test the Output
Verify the P16 channel now receives the processed audio. Musicians can immediately hear the EQ, compression, and other adjustments you’ve made.
Step 3: Use Case 2 – Multitrack Recording with Processing
For multitrack recording, most engineers prefer to capture raw signals to have maximum flexibility in post-production. However, there are scenarios where capturing fully processed signals is advantageous, such as broadcasting or when you need immediate results with minimal post-production.
Requirements:
- A Dante card installed in the Behringer Wing.
- A DAW, such as Adobe Audition, capable of multitrack recording.
- Dante Virtual Soundcard or compatible hardware on your connected computer.
Instructions:
Set Up the User Signal
- Go to Routing > Sources > User Signals.
- Select an unused slot (e.g., User Signal 2).
- Assign a Channel to the user slot (e.g., Pastor’s Microphone).
- Select Post tap point (to include all EQ, dynamics, inserts, etc.).
- Save the patch by clicking Close.
Patch to Dante
- Go to Routing > Outputs > Dante.
- Select an available Dante channel (e.g., Dante Channel 41).
- Assign the channel to User Signal 2.
Configure Your DAW
- Open Adobe Audition or your preferred DAW.
- Set Dante Virtual Soundcard as the audio device.
- Route Dante Channel 41 to a track in your DAW.
- Arm the track for recording and confirm it’s receiving processed audio from the Pastor’s Mic.
- Record and Monitor
Begin multitrack recording in Adobe Audition. The processed Pastor’s Mic signal will be captured, allowing for immediate use or later broadcast.
Best Practices for User Patching
- Name Your User Signals: A clear tag for each user signal (e.g., “Vocal Mic w/ Processing”) prevents confusion in complex setups.
- Double-Check Tap Points: Ensure you’ve set the correct tap point to include—or exclude—the desired level of processing.
- Monitor Routing Conflicts: Keep track of which outputs are patched to avoid overlapping or unwanted signal paths.
Key Benefits Summarized
Streamline Monitor Mixing
With user patching, you can ensure all musicians’ in-ears and personal monitors receive signals tailored to their needs without redundant processing.Maximize Multitrack Recording Options
Capture both raw and processed signals for ultimate post-production flexibility or ready-to-use output.Customizable Workflows
Whether for live sound, recording, or broadcast, user patching lets you adapt to different scenarios with ease.
Conclusion
User patching on the Behringer Wing is a game-changing feature that elevates sound management for live venues, churches, and production facilities. By understanding how to harness its potential, you can adapt your workflow to meet the exact demands of your setup. From monitor mixing to recording, these techniques ensure you deliver exceptional results every time.