Controlling Ableton Live with the Behringer Wing Using MIDI Over USB: A Step-by-Step Guide
The Behringer Wing offers advanced MIDI-over-USB capabilities that allow seamless integration with digital audio workstations (DAWs) like Ableton Live. By utilizing this feature, you can control key aspects of your Ableton session directly from the Wing, such as triggering plugin settings or syncing parameters like autotune keys. This guide will walk you through the process of setting up and controlling Ableton Live using MIDI commands from the Behringer Wing.
Why Use MIDI with the Behringer Wing?
Integrating the Wing with Ableton Live opens up powerful workflows, such as:
- Automatically changing autotune keys or other plugin settings based on snapshots.
- Streamlining live performances by controlling DAW parameters directly from the soundboard.
- Enhancing vocal processing by leveraging Waves plugins or similar tools in real-time.
Step-by-Step Instructions
1. Prerequisites
- Behringer Wing Firmware: Ensure your Wing is updated to the latest firmware (3.0 or later).
- Ableton Live Installed: Any version supporting MIDI control will work.
- USB Connection: A USB cable to connect the Wing to your computer.
2. Setup on the Behringer Wing
Step 1: Connect the Wing to Your Computer
- Use a USB cable to connect the Wing’s USB port to your computer.
- The Wing will appear as a MIDI device when connected.
Step 2: Configure MIDI Settings
- Go to the User Defined Keys section on the Wing.
- Select an available encoder (a rotary knob or button) that you want to use for MIDI control.
- Assign the encoder to a MIDI CC (Control Change) value:
- Navigate to View > User Defined Keys > MIDI CC.
- Assign a MIDI channel (e.g., Channel 1) and a MIDI CC Note for the encoder.
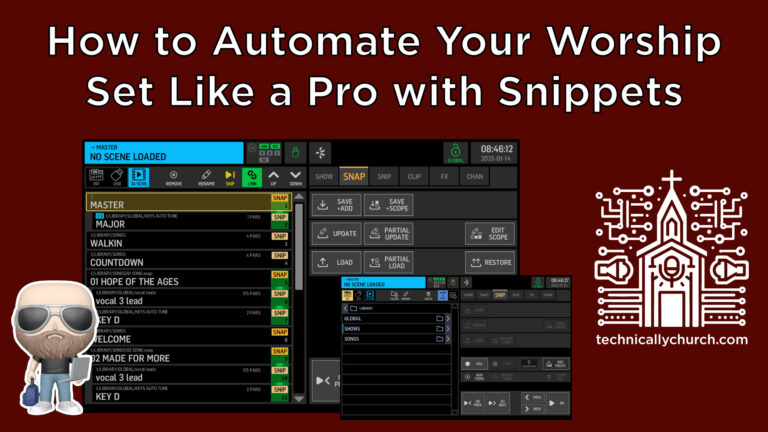
Step 3: Create Snippets for MIDI Commands
- Program snippets for each MIDI action:
- Turn the encoder to set a parameter (e.g., key for autotune).
- Save the setting as a snippet.
- Repeat for all necessary parameters (e.g., create snippets for each musical key).
- These snippets act as triggers for MIDI commands sent to Ableton.
3. Setup in Ableton Live
Step 1: Configure MIDI Preferences
- Open Ableton Live and go to Preferences > MIDI.
- Under MIDI Ports:
- Enable the Wing as an input device (Wing Port 1).
- Ensure the track and remote controls are enabled.
Step 2: Map MIDI Controls
- In Ableton, click the MIDI Map Mode Switch (top right of the screen).
- Highlight the parameter you want to control (e.g., the root key of a plugin).
- Turn the assigned encoder on the Wing to send a MIDI command. Ableton will map the parameter to the encoder.
- Exit MIDI mapping mode to save the configuration.
4. Using Waves Plugins for Vocal Processing
Step 1: Configure the Waves Plugin in Ableton
- Insert a Waves plugin (e.g., Waves Tune Real-Time) onto your vocal track.
- Set the plugin to process audio from the Wing and output back to the Wing.
Step 2: MIDI-Controlled Key Changes
- Use the Wing to control key and scale settings for the Waves plugin:
- Assign a Wing encoder to the root key parameter in the plugin.
- Use MIDI mappings to link the Wing’s snapshots or snippets with specific key changes.
5. Automating MIDI Commands with Snapshots and Snippets
Step 1: Link Snapshots and Snippets
- Create a snapshot on the Wing for each song or scenario.
- Link snippets (e.g., MIDI commands for key changes) to the snapshot.
Step 2: Automate Key Changes During Performances
- Press a single button on the Wing to load a snapshot, triggering:
- Fader and mute settings.
- Vocal bus routing (e.g., assigning lead and background vocalists).
- MIDI commands to Ableton, changing the autotune key automatically.
6. Testing and Fine-Tuning
- Test the connection by turning an encoder on the Wing and observing changes in Ableton (e.g., key changes in Waves Tune Real-Time).
- Adjust MIDI and audio settings as needed to optimize performance.
Conclusion
The Behringer Wing’s MIDI-over-USB integration with Ableton Live offers a streamlined workflow for live sound engineers and musicians. By automating plugin settings, routing changes, and parameter adjustments, this setup allows for seamless transitions and precise control during performances. Whether you’re running Waves plugins for vocal processing or synchronizing settings with your show file, the Wing and Ableton combination empowers you to deliver a polished, professional sound with ease.
Quick Reference Summary
- Connect the Wing to your computer via USB.
- Configure MIDI settings on the Wing and assign encoders to MIDI CC values.
- Set up MIDI preferences in Ableton, enabling the Wing as an input device.
- Map MIDI controls to Ableton parameters (e.g., plugin key changes).
- Create snippets for automated MIDI commands and link them to snapshots.
- Trigger snapshots during live performances to automate soundboard and DAW settings.
With these steps, you can take full advantage of the Behringer Wing’s MIDI capabilities for controlling Ableton Live.

